7 Tips for Choosing the Right Solar Panel Gasket
Choosing the right Solar Panel Gasket can protect more than a panel’s frame. It can help keep rain, dust, and humidity away from sensitive electrical connections. In real installations, a small seal may face strong sunlight, freezing nights, heavy wind, and repeated expansion. That hidden strip of material deserves careful attention.
This guide presents seven practical tips for selecting a gasket that fits the panel, mounting system, and local climate. The details matter. Check the profile dimensions, compression range, adhesive behavior, and resistance to ultraviolet exposure. Confirm that the material suits aluminum frames, glass surfaces, and nearby cable entries. A gasket that feels soft in the warehouse may harden after years on a dark rooftop. That mistake is easy to miss.
Reliable decisions should follow manufacturer data, field testing, and recognized enclosure requirements. Installers often inspect corners, joints, and cut ends because these areas fail before the middle sections. Still, no checklist is perfect. Even experienced teams can overlook a temperature change or a cleaning chemical used during maintenance. Careful observation remains essential.
The best choice balances sealing performance, durability, installation time, and total cost. Cheap material is not always economical. Replacing a failed seal can require panel removal, labor, and a second visit. These seven tips will help you compare materials and specifications with greater confidence. They will also encourage a useful question: will this Solar Panel Gasket still perform when the roof is hot, wet, and difficult to access?
Solar Panel Gasket Basics and Their Role in System Protection
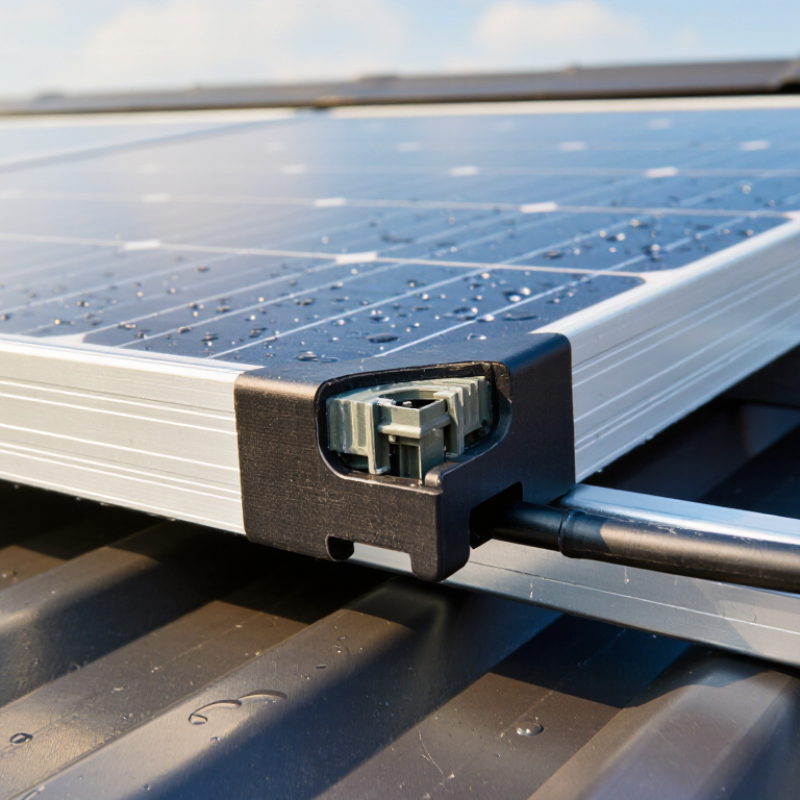
Solar-panel gaskets are small components with a large protective responsibility. They seal frames, junction boxes, cable entries, and mounting interfaces against rain, dust, humidity, and insects. The International Energy Agency Photovoltaic Power Systems Programme reported more than 1.6 terawatts of global photovoltaic capacity by the end of 2023. More installations mean more seals facing decades of outdoor exposure.
Choose the gasket material for the environment, not only its purchase price. Check resistance to ultraviolet radiation, ozone, temperature changes, and cleaning chemicals. Confirm the profile matches the joint precisely. Poor compression can create hidden water paths. Excessive compression can damage the seal or panel frame. Review compatibility with glass, aluminum, coatings, and adhesives. Ask for test evidence, including water ingress, aging, and compression-set performance. IEC 61215 and IEC 61730 provide useful photovoltaic durability and safety frameworks, although they do not replace product-specific gasket testing.
Small details matter. Keep sealing surfaces clean and flat. Avoid sharp bends at corners. Inspect cable-entry seals after installation. A gasket can look perfect and still fail. That assumption deserves testing. NREL’s photovoltaic degradation review found a median module degradation rate near 0.5% per year, but moisture-related damage can accelerate losses. Record installation torque, seal dimensions, and inspection dates. The IEA PVPS data shows how quickly solar assets are expanding; maintenance teams therefore need repeatable sealing checks, not visual guesses. A practical selection includes seven checks: material, profile, compression, compatibility, environmental resistance, test evidence, and serviceability.
7 Tips for Choosing the Right Solar Panel Gasket
Solar Panel Gasket Basics and Their Role in System Protection
Solar panel gaskets help seal module frames, junction boxes, and cable-entry points against moisture, dust, temperature changes, and mechanical stress. The chart shows typical service-temperature ranges for commonly used gasket materials; actual performance depends on formulation, installation, compression, and the manufacturer’s technical datasheet.
Seven Selection Tips
- Choose a material with a suitable operating-temperature range.
- Check resistance to water, humidity, and outdoor weathering.
- Confirm compatibility with glass, aluminum, backsheet, and sealants.
- Select the correct gasket thickness and compression level.
- Consider resistance to ultraviolet radiation and ozone.
- Verify long-term elasticity and resistance to compression set.
- Follow the installation, storage, and replacement requirements.
Assessing Material Quality, Durability, and Weather Resistance
A solar panel gasket does more than fill a narrow gap. It protects the enclosure from water, dust, and damaging air movement. Choose EPDM, silicone, or another verified elastomer with documented performance. Ask for test data, not vague claims. Check compression set, tensile strength, and hardness. A soft gasket may seal well today. It may creep under heat. Material quality is not just softness or thickness.
Inspect the profile for clean edges, even density, and accurate dimensions. A rough cut can create a water path beside the frame. Measure the groove before ordering, because a nearly correct fit can still leak. Durability depends on more than the material itself. Select a gasket that tolerates compression, expansion, vibration, and repeated installation. Avoid recycled content unless its performance is documented. That shortcut can become expensive.
Weather resistance deserves a real test, not a confident claim. Look for evidence against UV radiation, ozone, rain, humidity, frost, and temperature cycling. In coastal areas, check resistance to salt-laden air and trapped moisture. Press a sample after aging; it should recover without cracking or sticking. Installation experience matters too. Clean the channel, keep the joint dry, and avoid stretching the seal. Field inspections often reveal failures caused by rushed fitting. No gasket is permanent. Replace sections that harden, split, or lose contact.
Selecting the Correct Gasket Size, Shape, and Compatibility
7 Tips for Choosing the Right Solar Panel Gasket
Tip 1: Measure the channel, not the old gasket. Record width, depth, corner radius, and compression. A seal that looks close may still leak.
Tip 2: Match the gasket shape to the frame geometry. Use continuous lengths around corners when possible. Avoid sharp folds, stretched sections, and visible gaps. Compression should be firm, not crushed. Small errors matter.
Tip 3: Check material compatibility with the frame, glass, backsheet, and sealant. Ask for UV, ozone, temperature, and moisture-resistance data. NREL’s PV Lifetime Project links moisture ingress with several long-term module failures.
Tip 4: Confirm the operating range. Outdoor modules face heat, freezing cycles, wind, and thermal movement. Fraunhofer ISE’s 2024 Photovoltaics Report cites typical module degradation of about 0.3–0.5% annually. A weak gasket can accelerate avoidable damage.
Tip 5: Review documented testing. Look for evidence connected to IEC 61215 and IEC 61730 requirements, where applicable. These standards do not approve every gasket. They help assess module durability and safety.
Tip 6: Test the actual assembly. Install a sample with production tools, then inspect compression and corner tension. A drawing cannot reveal every installation problem.
Tip 7: Keep a compatibility record. Note dimensions, hardness, material, batch, and supplier data. This feels tedious. It prevents uncertain replacements years later. The best choice is not always the cheapest one; sometimes the specification is simply incomplete.
Comparing Installation Methods, Sealing Performance, and Maintenance Needs
7 Tips for Choosing the Right Solar Panel Gasket
Comparing Installation Methods, Sealing Performance, and Maintenance Needs
Choosing a solar panel gasket starts with the installation method. Factory-applied profiles usually provide consistent compression and cleaner edges. Cut-to-length gaskets fit irregular frames, but joints need careful alignment. Wet-applied sealants can fill small gaps, yet curing time, surface preparation, and uneven bead thickness create risks. Keep it practical. Check the frame design, contact pressure, temperature range, and replacement access before selecting a material.
Look for resistance to ultraviolet exposure, moisture, ozone, and repeated thermal movement. EPDM-based compounds often suit outdoor environments, while silicone may tolerate wider temperature changes. However, material names alone prove little. Request compression-set data, water-immersion results, and accelerated-weathering evidence. The IEA PVPS Task 13 reliability reports identify moisture ingress and thermal stress as recurring contributors to photovoltaic failures. A gasket must therefore maintain contact after years of movement, not merely pass an installation check.
Maintenance needs deserve equal attention. Inspect corners, overlaps, drainage paths, and exposed edges during scheduled service. The National Renewable Energy Laboratory reports a median photovoltaic degradation rate near 0.5% per year across reviewed studies, although gasket failure can accelerate localized damage. A small gap may admit dust first, then water. I have seen clean-looking seals hide poor compression beneath frame corners. That mistake is easy to repeat. Choose a gasket with documented tolerances, compatible adhesives, and accessible replacement procedures. Confirm compliance with relevant IEC testing requirements, but do not treat certification as a substitute for field inspection.
Balancing Product Standards, Service Life, and Overall Cost
Tip 1: Start with the product standard, not the lowest quotation. A solar panel gasket must tolerate heat, moisture, ultraviolet exposure, and repeated expansion. Check test reports, material specifications, and dimensional tolerances. A gasket that fits perfectly in a workshop may compress unevenly after years outdoors.
Tip 2: Match service life to the panel’s expected operating period. In field inspections, early gasket failure often begins at corners, screw points, and poorly supported edges. Look for stable sealing performance across temperature changes. Ask how the material behaves after prolonged sunlight and humidity. The answer should include evidence, not vague promises.
Tip 3: Calculate total cost, not purchase price. A cheaper gasket may require more frequent replacement, creating labor costs and production interruptions. Installation time matters, especially on large solar arrays. Confirm storage requirements, installation limits, and replacement availability before ordering. Small details become expensive later.
Tip 4: Review quality control records. Reliable suppliers should provide batch traceability, inspection methods, and clear acceptance criteria. Samples should be tested under realistic conditions. Laboratory data is useful, but it cannot represent every roof, climate, or installation habit.
One imperfect choice can remain costly.
A practical decision compares standards, expected service life, and maintenance risk together. I would also leave room for reassessment, because field conditions often differ from design assumptions. The best gasket is not always the most advanced or the cheapest. It is the one that delivers dependable sealing without creating avoidable future work.
7 Tips for Choosing the Right Solar Panel Gasket - Balancing Product Standards, Service Life, and Overall Cost
| Tip | Selection Dimension | What to Check | Practical Benchmark or Requirement | Service-Life Impact | Cost Consideration | Recommended Verification |
|---|---|---|---|---|---|---|
| 1Confirm Material Suitability | Elastomer type and formulation | Check resistance to ultraviolet radiation, ozone, heat, humidity, and temperature cycling. Confirm that the compound is intended for long-term outdoor exposure. | Use a weather-resistant elastomer with documented outdoor-aging performance, such as a suitable silicone or EPDM formulation. | Correct material selection helps reduce hardening, cracking, shrinkage, and loss of sealing force. | Higher material cost can be justified when replacement requires module removal or significant labor. | Request the material data sheet, aging test reports, hardness range, and batch traceability information. |
| 2Match the Gasket Profile | Geometry, dimensions, and compression | Verify the channel width, gasket height, corner design, joining method, and compression allowance against the module frame or mounting interface. | The gasket should provide continuous contact without excessive compression, stretching, buckling, or visible gaps. | A well-matched profile maintains stable sealing pressure and limits water or dust ingress over time. | Custom tooling may increase initial cost, but a correct profile can lower installation waste and field-failure costs. | Review engineering drawings and perform a fit check using production-intent frames, corners, and fasteners. |
| 3Evaluate Product Standards | Compliance and qualification evidence | Identify the applicable photovoltaic module, enclosure, electrical-safety, fire, and environmental requirements for the target market and system design. | Use documented test evidence applicable to the complete sealing system, not only a generic material certificate. | Standards-based qualification reduces the risk of premature failure caused by untested combinations of materials and designs. | Testing and documentation add upfront cost but can reduce approval delays, warranty exposure, and redesign expenses. | Check test scope, sample configuration, test duration, acceptance criteria, and whether reports are current and traceable. |
| 4Check Environmental Resistance | Climate and installation conditions | Consider the project’s UV intensity, ambient temperature range, humidity, salt spray, dust, snow, wind, and potential chemical exposure. | Select a gasket qualified for the site climate, including the expected temperature range and exposure to moisture and pollutants. | Site-specific resistance helps prevent swelling, embrittlement, corrosion-related leakage, and compression-set problems. | Over-specifying resistance may increase cost; under-specifying it can create costly service calls and early replacement. | Compare site conditions with material limits and review accelerated aging, salt-spray, humidity, and temperature-cycle results where relevant. |
| 5Assess Compression Set | Long-term sealing force retention | Review compression-set behavior at the expected operating temperature and compression level. Consider thermal expansion and repeated temperature cycling. | Prefer lower compression set and stable recovery after aging, while avoiding compression that could distort the module or frame. | Stable recovery supports a durable seal as the gasket ages and the assembly experiences daily thermal movement. | A gasket with better compression-set performance may cost more but can reduce leakage-related inspection and repair costs. | Request compression-set data at representative temperatures and inspect aged samples for permanent deformation. |
| 6Review Installation and Service | Handling, joining, and replacement efficiency | Evaluate whether the gasket is easy to cut, position, join, and inspect without stretching or contaminating the sealing surface. | Choose a design with clear installation tolerances, repeatable corner treatment, and practical quality-control checkpoints. | Consistent installation reduces hidden gaps, misalignment, and damage that can shorten the effective service life. | Labor and rework can exceed the material price, especially on large-volume or difficult-to-access installations. | Run a trial installation, measure assembly time, record scrap rates, and inspect representative sealed assemblies. |
| 7Compare Total Cost of Ownership | Purchase price, risk, and lifecycle cost | Compare material price with tooling, testing, freight, installation labor, inspection, warranty risk, replacement access, and expected service life. | Select the option with the best balance of verified performance, availability, installation efficiency, and predictable lifecycle cost. | Longer service life is valuable only when supported by suitable design, proven materials, and reliable manufacturing control. | Calculate cost per installed module or project, rather than comparing gasket price alone. | Use a lifecycle-cost worksheet covering initial cost, installation time, expected replacements, downtime, and maintenance requirements. |
Note: Actual gasket selection should be validated against the module design, installation method, site climate, applicable regulations, and documented qualification testing.
Article Source:
Let's Build Together
Contact Us: Call 435-563-3503
-OR- Fill in the form below and we will call you back.