
10 Tips for Choosing the Right Road Excavator?
Choosing the right Road Excavator can determine whether a project moves smoothly or quietly loses money. The decision affects digging speed, fuel use, operator comfort, transport planning, and daily maintenance. A machine may look powerful in a brochure, yet struggle on a narrow road shoulder or unstable embankment.
Mike Vorster, a respected construction equipment management author and educator, puts the principle plainly: “The right machine is the one that performs the work at the lowest total cost.” That idea deserves attention. Purchase price matters, but it does not tell the whole story. A smaller excavator may reduce transport costs, while a heavier model may provide better reach and stability. The correct choice depends on soil density, trench depth, working space, attachment needs, and expected production hours.
This guide examines ten practical tips for selecting a Road Excavator. It considers operating weight, engine power, hydraulic performance, fuel consumption, undercarriage design, cab visibility, service access, and dealer support. It also looks at real jobsite details, such as muddy tracks, tight turning areas, and repeated loading cycles.
No checklist is flawless. Site conditions can change quickly. An excavator that worked well on dry gravel may perform poorly in wet clay. Buyers sometimes focus too heavily on horsepower and overlook hydraulic control or operator fatigue. That mistake can be expensive.
The best decision combines measured data with experienced judgment. Walk around the machine. Test the controls. Review service records. Ask difficult questions before signing. Reliability is not promised by appearance alone.
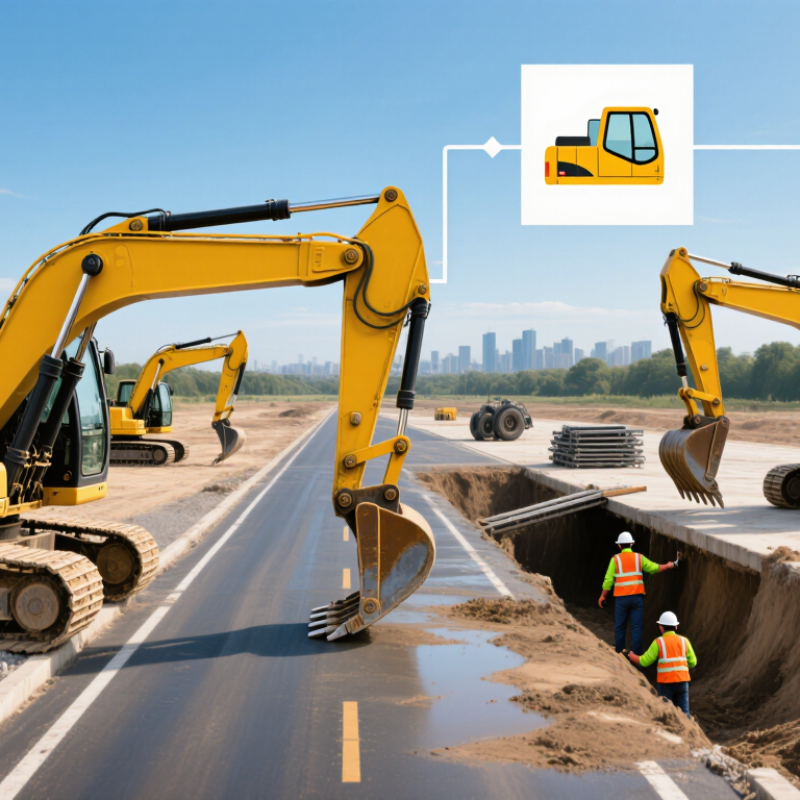
Define the Road Excavation Project and Operating Requirements
Before choosing a road excavator, define the worksite with measurable details. Record trench depth, excavation width, soil type, access limits, and required daily output. FHWA’s 2023 Highway Statistics reports more than four million public-road miles in the United States, so conditions vary greatly between projects. A compact excavator may suit narrow urban lanes, while deeper cuts need greater reach, hydraulic power, and lifting stability.
Utility risk also shapes the operating requirements. The Common Ground Alliance’s 2023 DIRT Report recorded more than 200,000 utility-damage events across the United States and Canada. Confirm utility markings, required digging clearances, traffic-control zones, and spoil-placement areas before selecting machine size. Small turning space matters. So does tail-swing clearance. An excavator with excessive width can create delays, even when its digging force looks impressive.
On site, compare the machine’s rated depth with the actual trench profile, not a brochure maximum. Check ground pressure on weak shoulders, transport weight, attachment compatibility, and fuel use during repeated cycles. The U.S. Bureau of Labor Statistics continues to classify construction equipment operation as a safety-sensitive occupation, making visibility, stable controls, and operator training practical selection criteria. I have seen specifications appear suitable until soft ground, overhead restrictions, or frequent repositioning changed the decision. A short field trial can expose that mistake.
10 Tips for Choosing the Right Road Excavator? - Define the Road Excavation Project and Operating Requirements
| No. | Selection Tip | Project or Operating Requirement | Practical Excavator Data and Target Range | Why It Matters |
|---|---|---|---|---|
| 1 | Define the excavation task | Road widening, drainage trenching, utility installation, slope work, shoulder repair, or pavement removal. | Use a compact excavator of approximately 2–6 metric tonnes for confined work, a mid-size excavator of approximately 10–20 tonnes for general road construction, or a heavy excavator above 20 tonnes for large-scale earthmoving. | Excavator size should match the material volume, working space, lifting requirement, and planned production rate. |
| 2 | Check required digging depth | Determine the deepest trench, culvert, foundation, or drainage structure that must be reached. | Select a configuration whose maximum digging depth exceeds the required depth by a suitable working margin. Typical ranges are about 3–4 m for compact models, 5–7 m for many mid-size models, and more than 7 m for larger configurations. | A digging-depth margin helps maintain bucket control and reach the trench bottom without operating at the machine’s limit. |
| 3 | Match bucket capacity to production goals | Estimate the volume of soil, aggregate, or broken pavement to be removed per hour. | Compact machines commonly use buckets below 0.30 m³, mid-size machines often use approximately 0.40–1.00 m³ buckets, and larger machines may use buckets above 1.00 m³, depending on material density and configuration. | A correctly sized bucket balances cycle time, hydraulic power, payload, and truck-loading efficiency. |
| 4 | Evaluate site access and transport limits | Consider lane width, bridge limits, overhead obstructions, work-zone entry points, and haulage regulations. | Measure the maximum permitted transport width, height, operating tail swing, and machine mass before selecting the excavator. Compact machines generally provide easier transport and access in restricted areas. | Physical access and legal road-transport limits can exclude an otherwise suitable excavator from the project. |
| 5 | Select the correct undercarriage | Work may take place on paved surfaces, soft shoulders, embankments, muddy ground, or uneven temporary roads. | Choose standard tracks for general stability, wider tracks or low-ground-pressure options for soft soil, and rubber tracks where reduced surface damage is important. Ground pressure depends on machine mass and track contact area. | The undercarriage affects stability, flotation, maneuverability, pavement protection, and travel performance. |
| 6 | Verify lifting and reach requirements | Lift pipes, drainage sections, manhole components, barriers, or other materials beside the road. | Check the rated lift capacity at the actual boom radius, working height, and machine orientation. Do not rely only on the excavator’s maximum rated lift figure. | Lift capacity decreases as reach increases, so the load chart must match the real placement distance and ground conditions. |
| 7 | Choose suitable hydraulic attachments | The project may require trenching, grading, compaction, breaking, cutting, or material handling. | Confirm auxiliary hydraulic flow and pressure for attachments such as breakers, compactors, hydraulic thumbs, tilt buckets, and augers. High-flow attachments generally require greater hydraulic capacity than standard buckets. | Attachment performance depends on hydraulic compatibility, not only on the excavator’s operating weight. |
| 8 | Consider fuel efficiency and duty cycle | Long shifts, repetitive trenching, frequent travel, or continuous loading can significantly affect operating cost. | Compare rated engine power, fuel consumption records, idle-management functions, hydraulic efficiency, and expected working hours. Use the smallest excavator that can meet the required production and lifting targets. | Oversized equipment can increase fuel, transport, and maintenance costs without improving output on smaller road projects. |
| 9 | Assess operator visibility and safety features | Work may occur near live traffic, workers, utilities, pedestrians, and other construction equipment. | Prioritize a clear cab view, rear and side monitoring systems, travel alarms where required, falling-object protection when applicable, automatic swing or travel warnings, and a certified rollover-protective cab structure. | Visibility and protective systems help reduce collision, struck-by, rollover, and utility-contact risks in congested work zones. |
| 10 | Plan maintenance and operating support | The excavator may work far from a workshop or in conditions involving dust, mud, vibration, and extended daily use. | Check service-access points, daily inspection requirements, recommended fluid and filter intervals, spare-part availability, diagnostic support, warranty terms, and operator training provisions. | Reliable maintenance support reduces downtime and helps preserve hydraulic, engine, undercarriage, and structural service life. |
Let's Build Together

Contact Us: Call 435-563-3503
-OR- Fill in the form below and we will call you back.